Diy Aquarium Background Drylok
Because of this, drylok is plain white in color. Diy spray bar for my canister filter.
CichlidForum • DIY Styrofoam/Drylok Aquarium Shale Wall Background
Oh and let silicone cure again, of coarse.
Diy aquarium background drylok. Apologies, i suppose i could have been more detailed 😋. Wrap the window mesh around the pvc like in the picture, secure it with a rubber band, apply silicone, let silicone cure, take rubber band off, make holes of the same size in background, apply silicone on walls of holes and finally slide the gutters in place. Paint the entire background with a heavy coat.
Ingredients an empty fishtank owens corning pink insulating foam sheets 100% silicone (it is very important to use 100% silicone with no additives. You can also place it in the tank to get an idea how it will look. This definitely makes for a unique aquarium and i can rest assured knowing that it is a one of a kind aquarium!
We suggest aiming to apply the thinnest layer possible while ensuring the layer still appears. Seems like it would be easier to do, though i'm not sure if the sanded texture would look right for tree roots. ( normally 48 hrs) #3.
Add very small amounts of concrete color to the sealer until you. I have made a couple diy backgrounds for my tanks but omitted the concrete and just painted over. If you have a lot of patience you can even use rocks that are light, a good.
Diy aquarium background, diy paludarium, diy pets, paludarium | 3 comments. Ge silicone is also safe. The diy projects in this tank are:
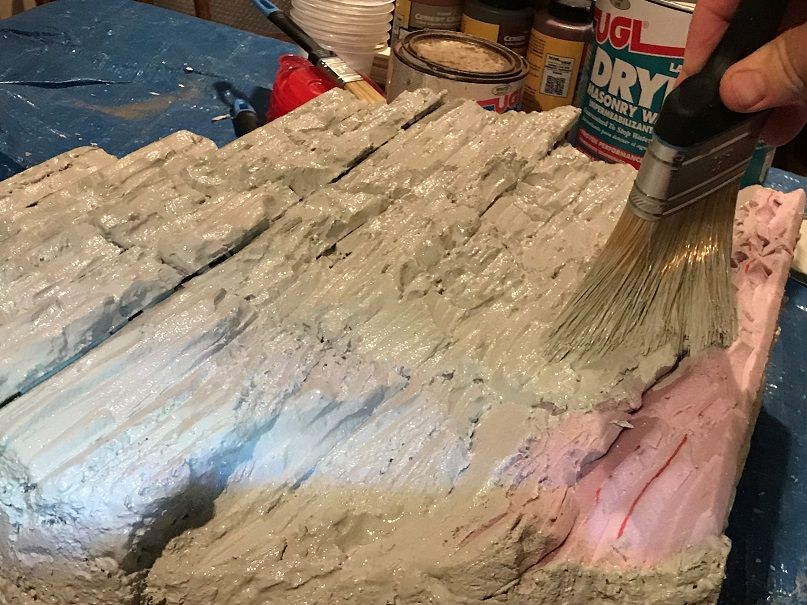
The second option is a product called drylok. Diy 3d styrofoam aquarium background painted with drylok and cement dye, coated with an acrylic clearcoat. Cover all exposed styrofoam with the sealer/color mixture.
It was a lot cheaper than buying a custom made background and you can make it. If you were to use dryloc, which is meant to be applied on concrete. I recommend measuring your tank and sketching out your desired design.
Avoid any silicone with mildew inhibitors. 3rd coat of drylock added a colored coat. Added the valley walls and started detailing.
Feel free to watch this on vimeo where you can comment without youtube disabling you. This video documents my experience and the entire process! This layer should be less than 1/8 thick, which both conserves silicone, while allowing for the fastest cure time.
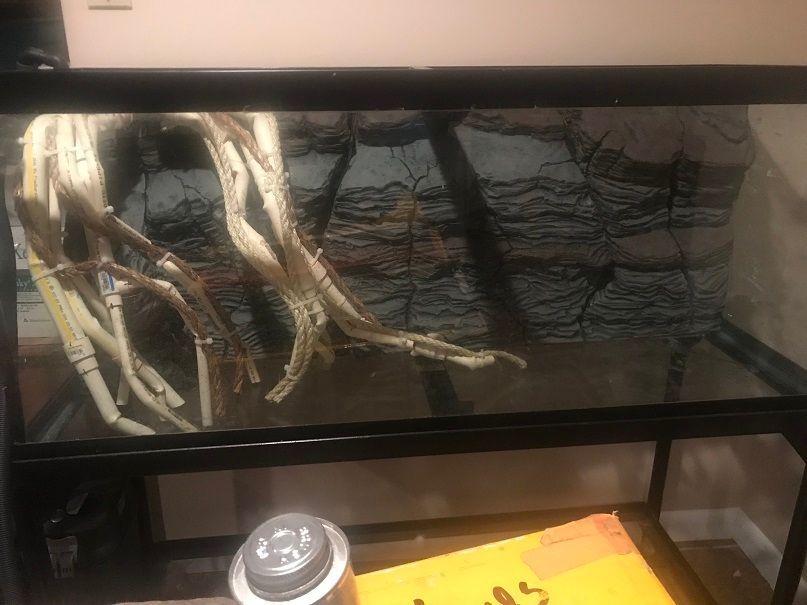
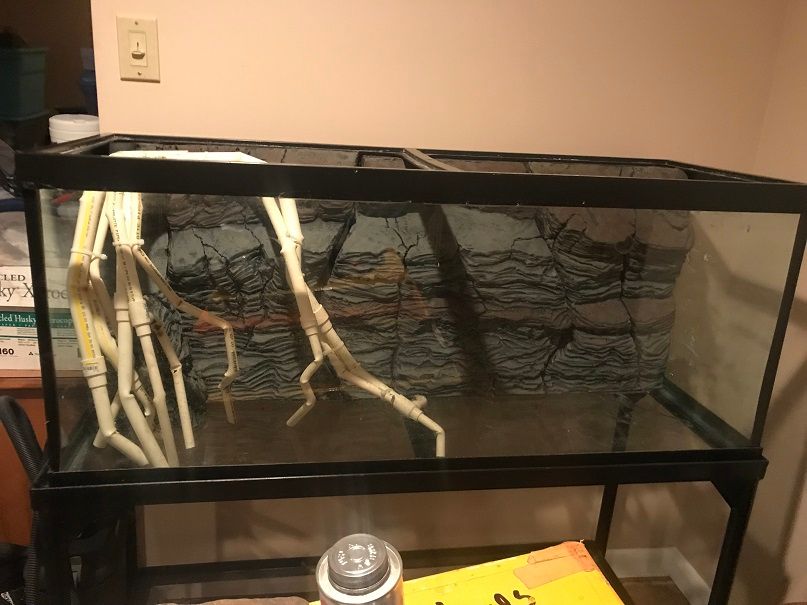
Serrated foam cutting knife (i used my kitchen bread knife ha ha) bamboo skewers toothpicks drylok. [ 2] now, it’s worth mentioning that drylok isn’t really paint. The sandfall is made with a piece of 1 pvc pipe embedded in the sytrofoam that uses an air pump and airstone to draw the sand up and out the outlet hidden below lord vader.
I will be starting one for my 90 gallon soon and it will be only foam and tinted drylock. It seals whatever you coat it in, protecting it from water. How to build a dyi foam fish tank background or caves method 1:
Leave this for 48 hours so that the silicon will cure properly before moving the tank to its intended position. I recently decided to make the jump to create a 3d aquarium background! I made mine from a combination of pink foam board insulation, spray foam, cement and tinted drylock paint.
Make sure you allow for a full cure. Finished detailing and added a cave. It’s normally used to water proof basements, but it also is used to seal concrete bird baths and ponds.
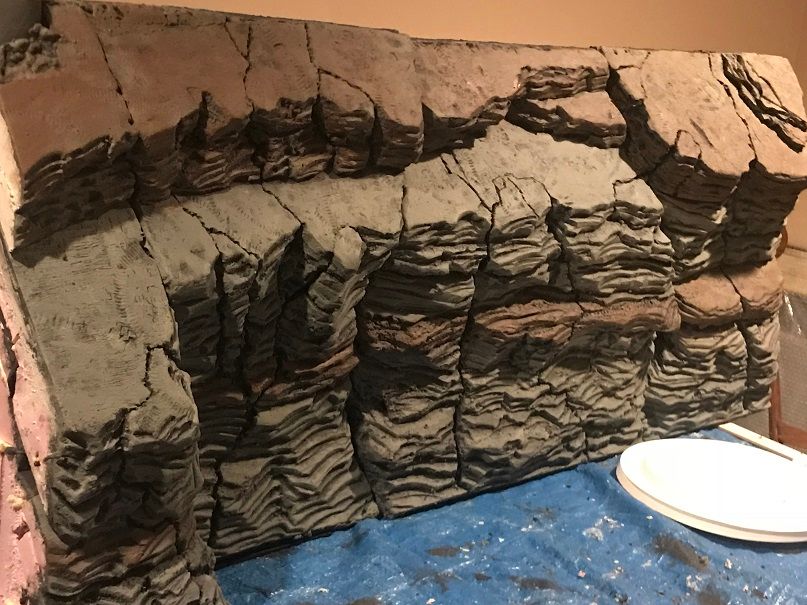
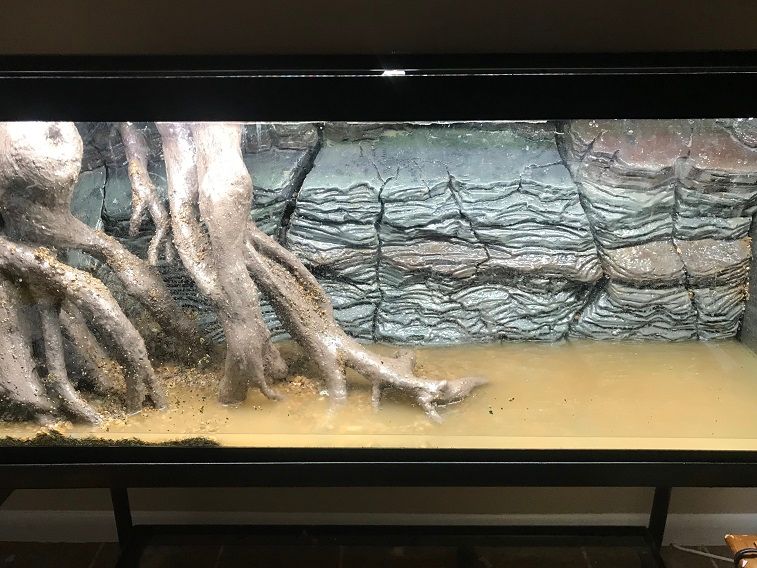
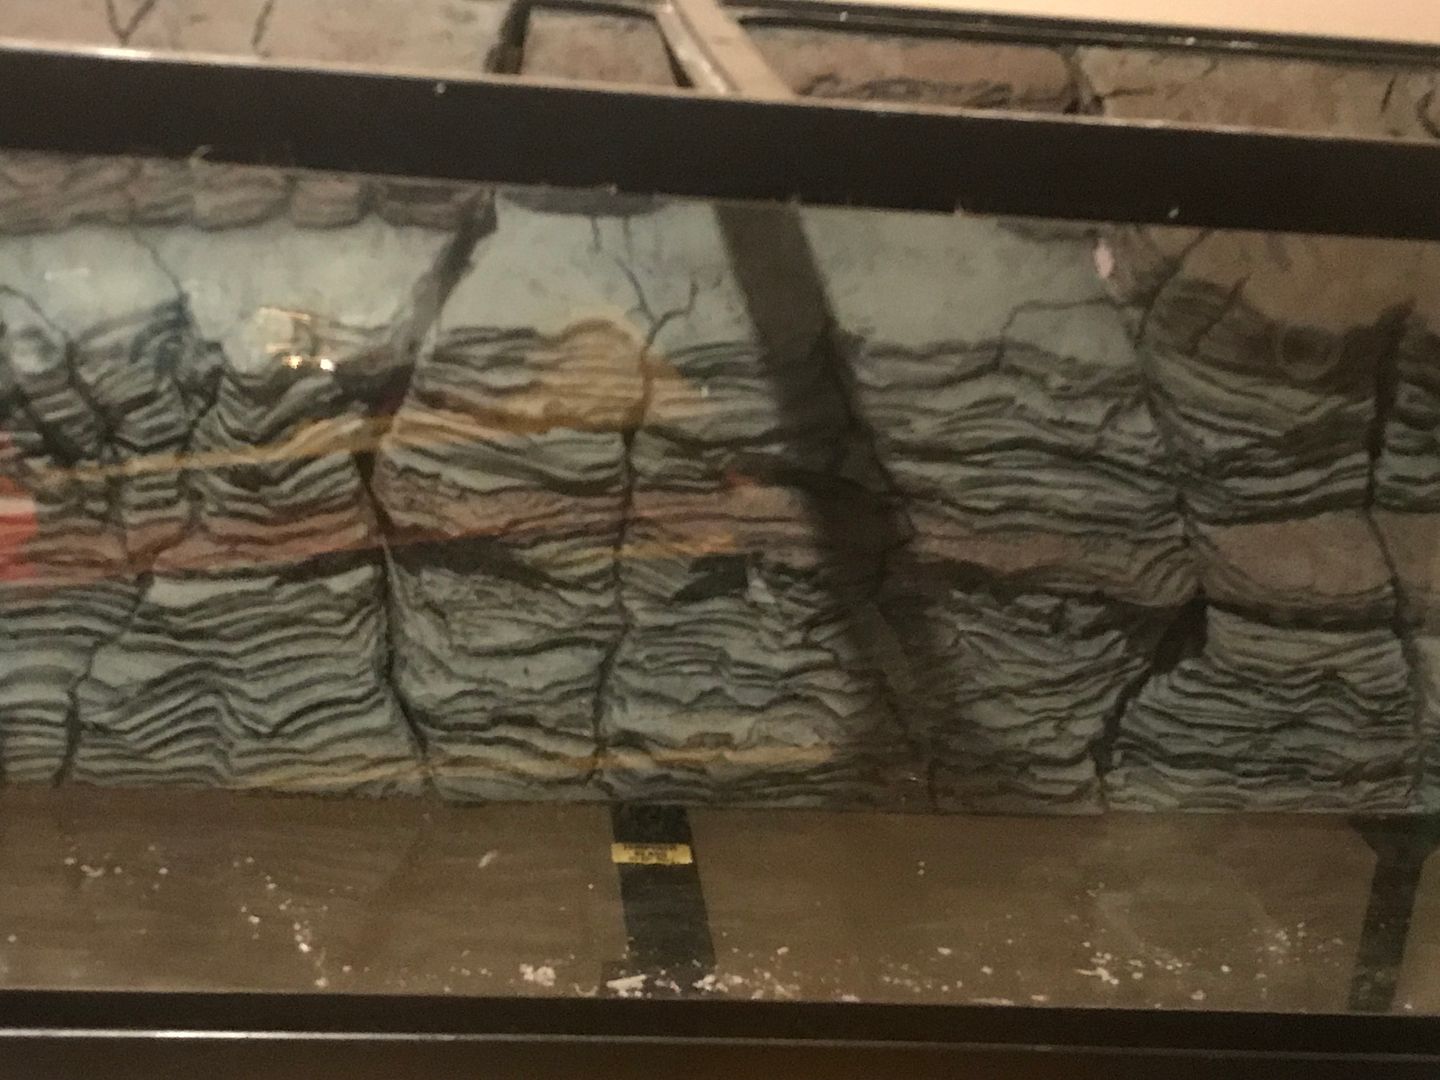
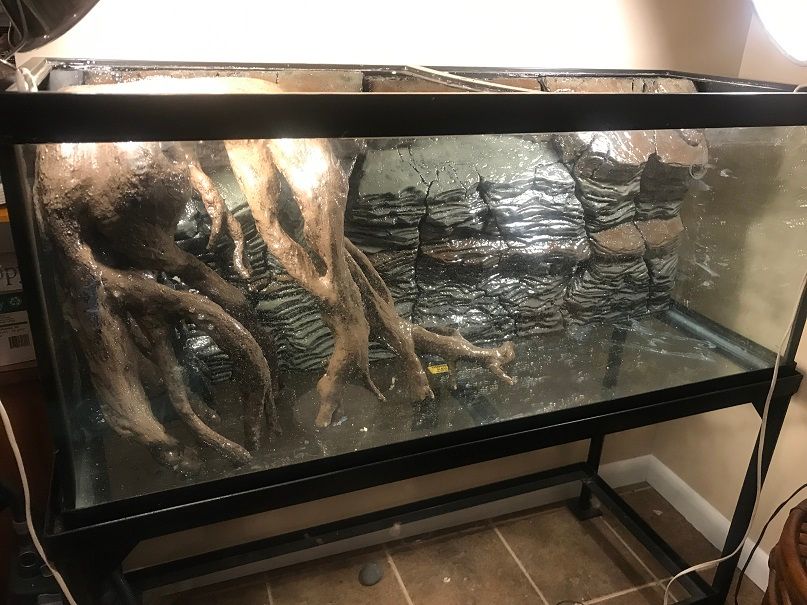
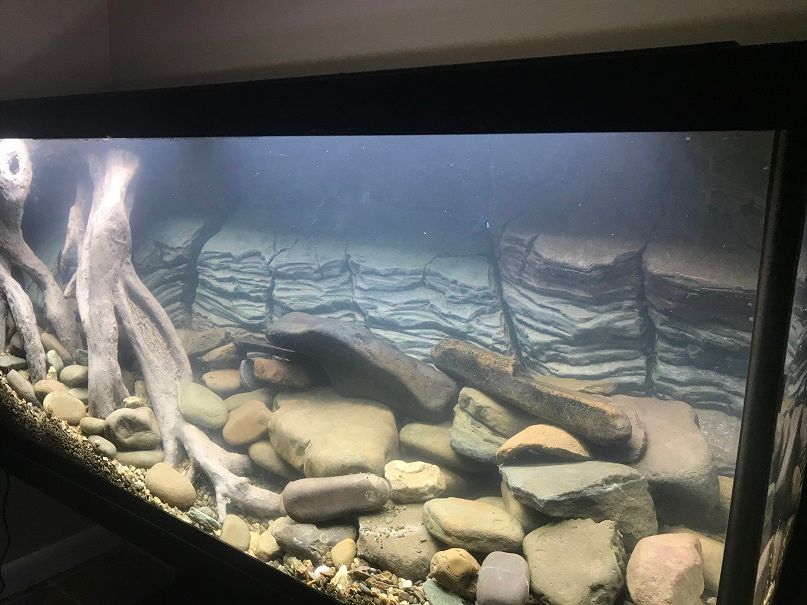
75 gallon us native stream tank diy styrofoam rock wall the paint is the second coat of drylok, tinted to resemble the base rock color of our river cliffs. This amount of weight implies being sited on the ground on something like a concrete slab or using pond liner with a cushion layer. Does anyone happen to know what the uk equivalent is for drylok® latex masonry waterproofer, seemingly available only in the us.
I would like this to last as long as possible. Lay the tank onto its back placing a styrofoam sheet underneath to protect it, and then all you have to do is stick it into place with aquarium silicon. Make a 3d aquarium background:
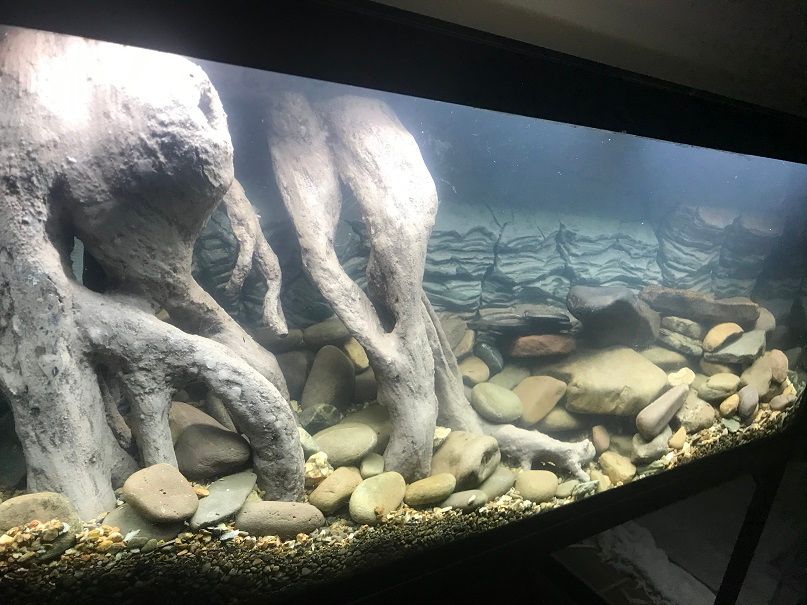
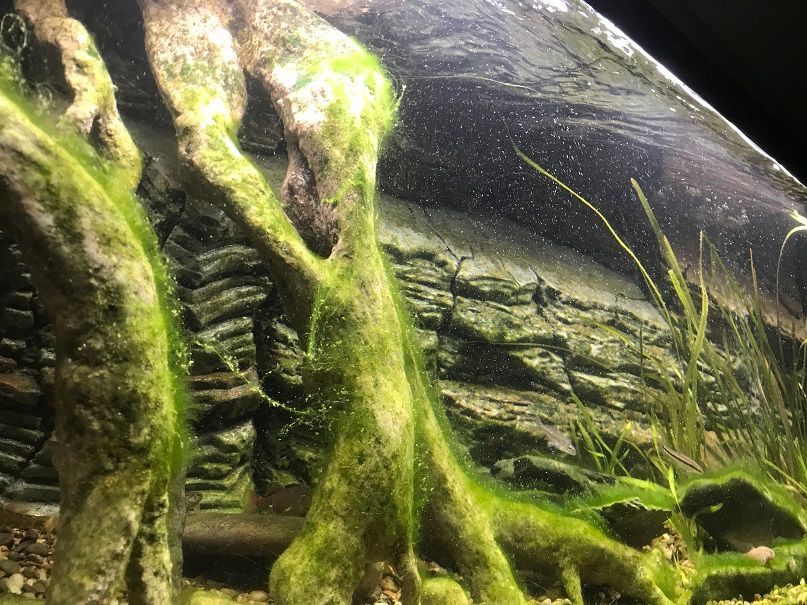
Diy faux roots to simulate sycamore tree roots. Fish lore's aquarium fish forum. The method i settled on involves drylok and styrofoam!
To start, throw on some latex gloves and apply a thin, even layer of black aquarium grade silicone along whatever section of the glass panels you'll be building the background on. The water alone will weigh 3000 to 4000 kilograms ( ~8800 pounds!). I made this background for my 120 gallon aquarium.
Any pros/cons you would like to share. Can you paint the background with drylok? About smitty aquatics i am a special education teacher from denver.
I recently decided to make the jump to create a 3d aquarium background! The first coat was just drylok gray. Its a styro background diy, we used silicone to glue the pieces together, some quickcrete painted on in 3 coats to give a rock appearence and add texture, now im looking to seal.
It's a 30 gallon tank, but the background only goes up halfway so i only need about 20 gallons of water to cover it completely. Color and sealing pour some drylok into a bowl or disposable container. Has anyone tried using tinted dyrlok instead of grout/concrete to seal and color sytrofoam rocks or branches?
It was actually pretty easy to make but it was very time consuming and messy. I will be stippling lighter shades of this color a few times to make the rock less monotone and more realistic, and then finish with light color highlights. It is tintable with some cement tinting.
May 15, 2011 #1 working on my styrofoam background. In the pic below i had already begun the carving process. I made the background out of styrofoam, great stuff, and sealed it with drylok mixed with acrylic paints, and installed with 9 tubes of ge i silicone.
Here's an example of an aquarium background made this way: I made one for my 46 bowfront and i love it, makes the aquarium imho. I'd definitely do it again though!
It's a sealer used to coat the fake rock backgrounds and similar in aquariums, vivariums and paludariums. I have bought cement but have read a few people using drylok instead. A setup for 112 gallons is quite different than a 3000 to 4000 litre system.
For realistic color, add shadows and highlights with.
CichlidForum • DIY Styrofoam/Drylok Aquarium Shale Wall Background
Pin by Mutaz Shurafa' on mutaz Aquarium backgrounds, Background diy

CichlidForum • DIY Styrofoam/Drylok Aquarium Shale Wall Background

Pin by Oceann Lean on Fish tank stuff Aquarium backgrounds, Aquascape

CichlidForum • DIY Styrofoam/Drylok Aquarium Shale Wall Background
CichlidForum • DIY Styrofoam/Drylok Aquarium Shale Wall Background
Finished DIY 3D background w/ Drylok YouTube

CichlidForum • DIY Styrofoam/Drylok Aquarium Shale Wall Background
CichlidForum • DIY Styrofoam/Drylok Aquarium Shale Wall Background
CichlidForum • DIY Styrofoam/Drylok Aquarium Shale Wall Background

CichlidForum • DIY Styrofoam/Drylok Aquarium Shale Wall Background
CichlidForum • DIY Styrofoam/Drylok Aquarium Shale Wall Background
Pin by Craig Lewis on 3d aquarium backgrounds Aquarium backgrounds

Making a Custom 3D Drylok Aquarium Background YouTube

CichlidForum • DIY Styrofoam/Drylok Aquarium Shale Wall Background
CichlidForum • DIY Styrofoam/Drylok Aquarium Shale Wall Background

207 Timelapse Removal of 3D Aquarium Background with Drylok Update

CichlidForum • DIY Styrofoam/Drylok Aquarium Shale Wall Background
CichlidForum • DIY Styrofoam/Drylok Aquarium Shale Wall Background